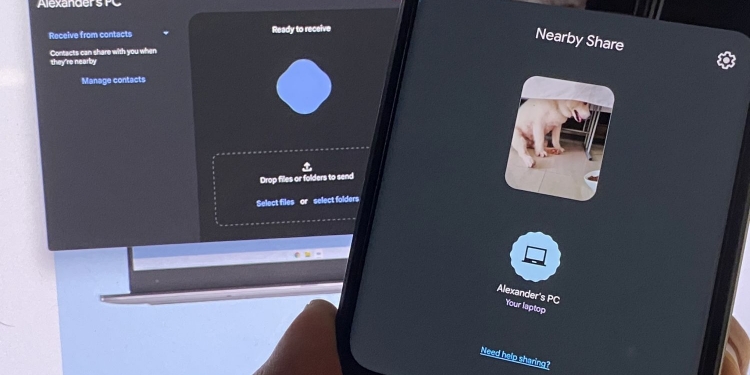
AirDrop is probably one of the greatest features of the Apple ecosystem allowing any iOS, iPadOS and macOS user to transfer photos and files easily and instantly without uploading to the cloud. For those who are on Android and Windows camp, you can finally get some of the “AirDrop” action with Nearby Share Beta for Windows. Before this, Nearby Share was mostly limited to Android-to-Android transfers.
We tried the new Nearby Share for Windows and it’s currently the best way to share files between devices that are outside the Apple ecosystem. Here’s how you can get started.
How to set up Nearby Share on your Windows PC?
Step 1: Download the Nearby Share Beta for Windows from the Android website. Take note that this application is compatible with Windows computers running a 64-bit version of Windows 10 and up. At the moment, ARM devices are not supported.
Step 2: After installing Nearby Share Beta for Windows, Login using your Google account. This will make Nearby Share transfers seamless between devices that are currently logged in with your Google account.
Step 3: That’s it. You are now ready to send and receive files between your Android and Nearby Share-enabled Windows PCs.
How to transfer files from Android phones to Windows PC using Nearby Share?
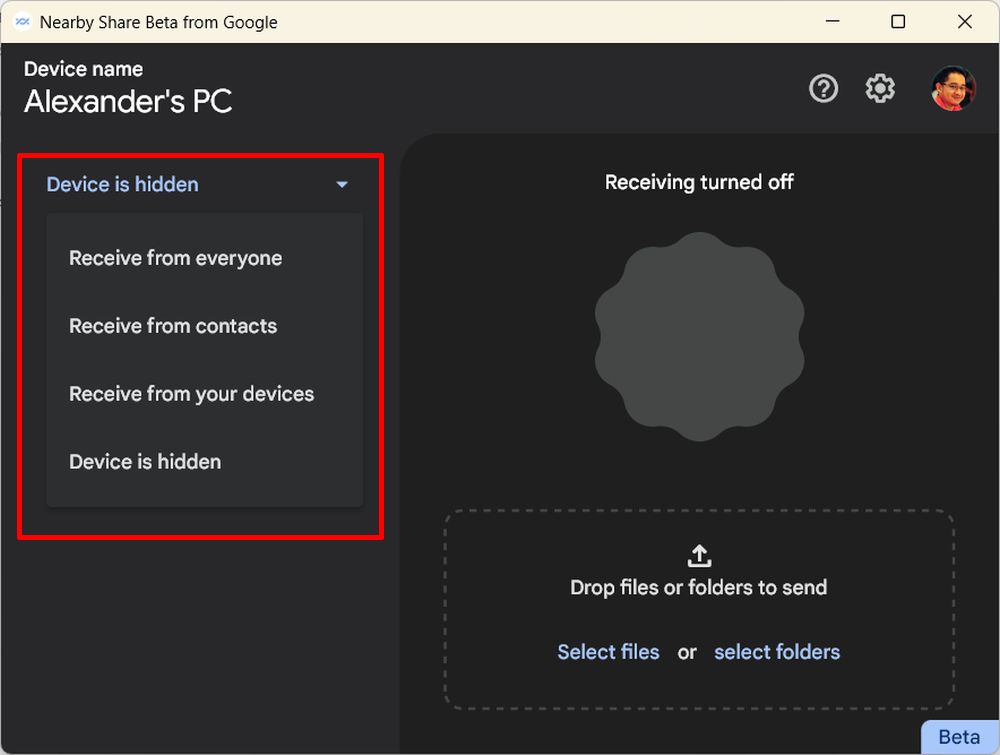
Step 1: To start receiving files, make sure your Nearby Share on your Windows PC is set up correctly so that it is visible to devices near you. On the left corner, you can choose to set between “Device is hidden” or Receive from “your devices”, “contacts” or “everyone”. If you only want to accept files from your own devices (logged with the same Google account) you can choose “Receive from your devices”. You can change this visibility setting at any time if you wish to accept files from unknown or third party devices.
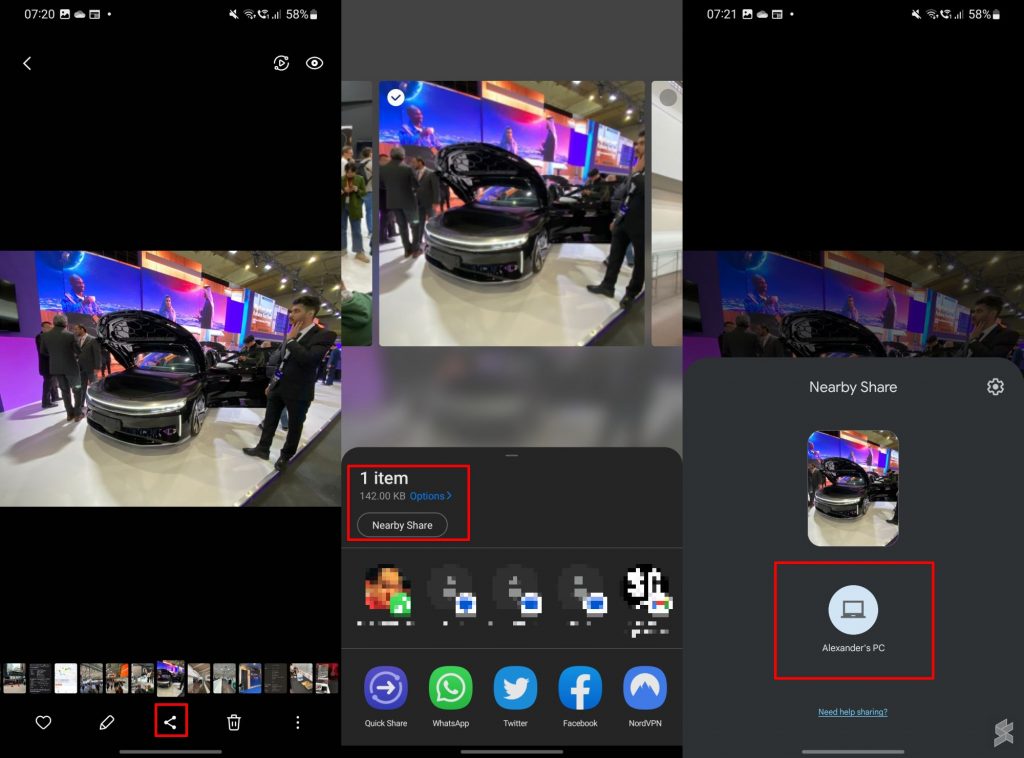
Step 2: On your Android Smartphone, open or select a file that you wish to send. Tap on the “Share” icon.
Step 3: Tap on “Nearby Share” shortcut or “Nearby Share” icon.
Step 4: Nearby Share will start displaying Nearby Share devices around you. Tap on the name of the PC that you wish to send the file.
Step 5: The file will be received automatically if the PC is logged in with your account. If the file is sent from an unknown device, a prompt will appear with a 4-digit PIN and you will be required to click “Accept” before the file is transferred.
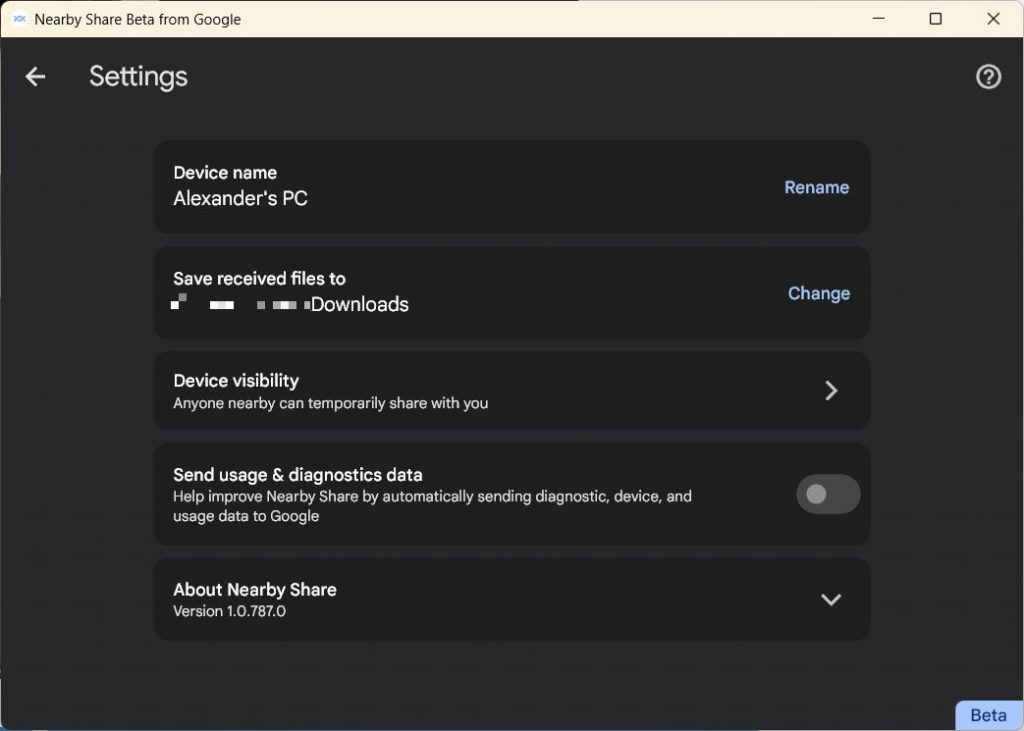
Step 6: Once the Nearby Share transfer is done, you can open the file immediately or find the file in the default “Download” folder. You can change the location and the device name for Nearby Share through the settings.
How to transfer files from a Windows PC to an Android device using Nearby Share?
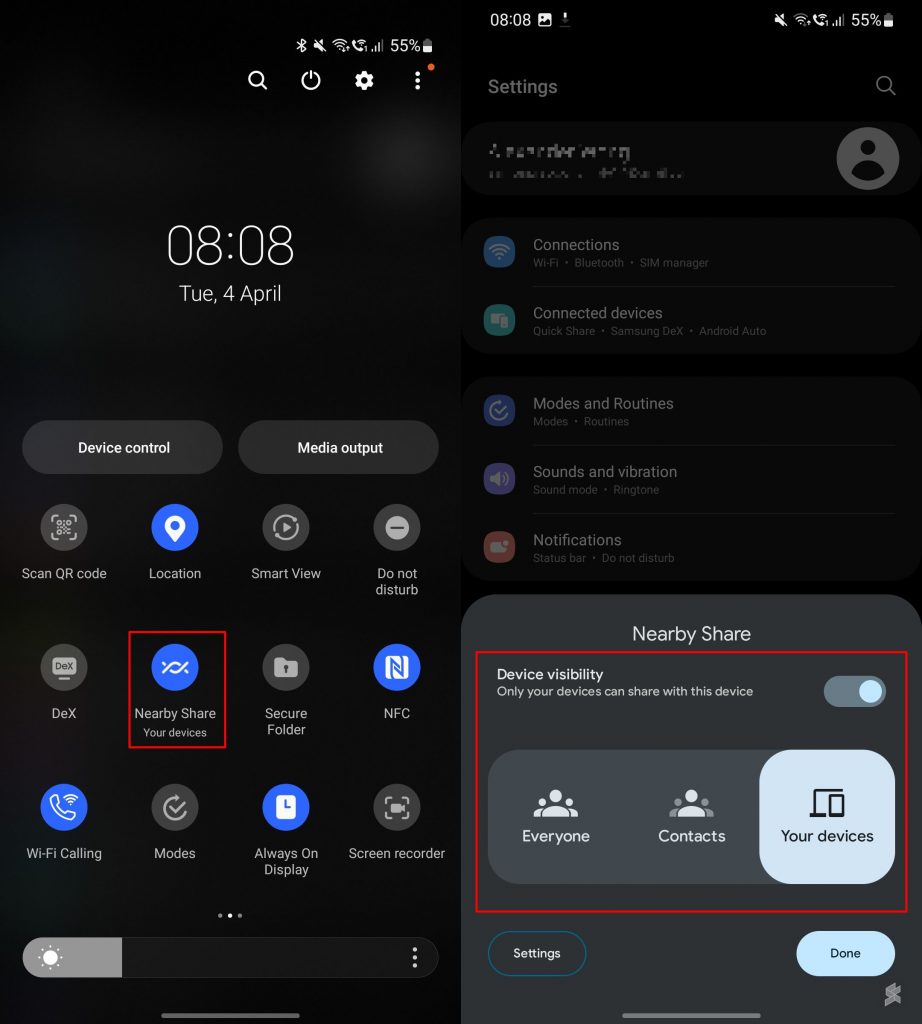
Step 1: Make sure your Android device is unlocked and Nearby Share is enabled. You can turn on Nearby Share from the drop-down menu shortcuts or search for “Nearby Share” in your device’s settings. You can choose to set Nearby Share visible to your Device Only, Contacts or to everyone.
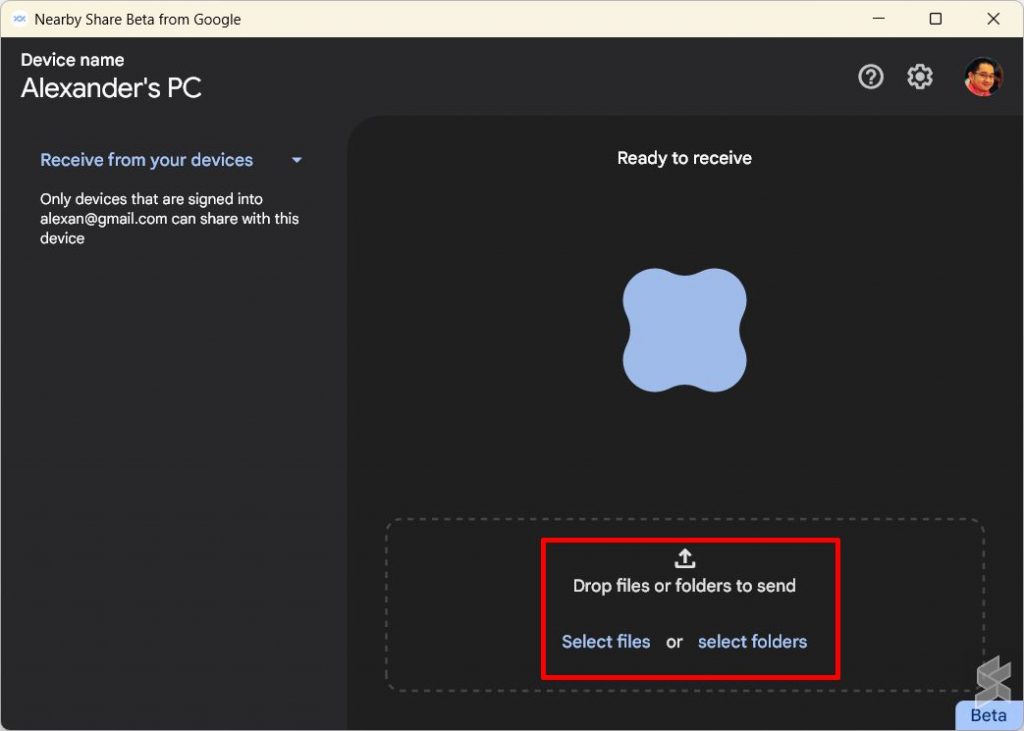
Step 2: From your Windows PC, launch Nearby Share and select the files and folders that you wish to send. You can also drag and drop files directly into Nearby Share on Windows.
Step 3: Your PC will start searching for Nearby Share devices near you. Tap on the device that you wish you send.
Step 4: Your files will be transferred immediately and you can view them in your Android device’s download folder. If you’re sending to an unknown Android device, the receiver must tap on Accept to receive the files.
Nearby Share uses a combination of Bluetooth and WiFi for instant sharing. Take note that this wireless file transfer feature works when the devices are nearby within a range of 5 metres. According to Android, All Nearby Share transfers are protected by E2E encryption. If you turn on visibility to all devices, it will automatically turn off after some time as a security precaution.

