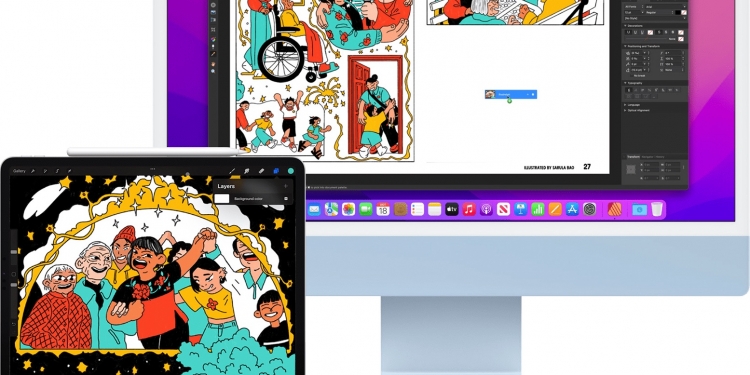
Apple has released a Beta version of Universal Control—which lets you use the keyboard, mouse, or trackpad of your Mac to control up to two other nearby Mac or iPad devices. However, since the feature is still in Beta, “some features might not work as expected”. But here’s how to use it, anyway.
What is Universal Control?
Basically, Universal Control is like a heightened version of Sidecar, which is a feature that lets you use your iPad as a second screen for your Mac. Universal Control additionally links multiple Macs and iPads together under a single mouse and keyboard. This way, you can use the keyboard and cursor from your Mac to control an iPad sitting beside it—and vice versa. If you’ve got a Magic Keyboard for an iPad Pro, you can use it to control a Mac, too.
However, in order to use Universal Control, your Mac needs to be running macOS 12.3 or later, while your iPad must be on iPadOS version 15.4 or later. So, make sure you’ve updated your devices accordingly before you try using the feature.
You should also take note that the devices you have might not be the right devices for this feature. Here are the Apple devices that you can use for Universal Control:
Macs
- MacBook introduced in 2016 or later
- MacBook Pro introduced in 2016 or later
- MacBook Air introduced in 2018 or later
- Mac mini introduced in 2018 or later
- iMac introduced in 2017 or later, plus iMac (Retina 5K, 27-inch, Late 2015)
- iMac Pro
- Mac Pro introduced in 2019 or later
- Mac Studio
iPads
- iPad Pro (all models)
- iPad (6th generation) or later
- iPad Air (3rd generation) or later
- iPad mini (5th generation) or later
Setting up Universal Control
- Make sure that both your Mac and iPad are signed in with the same Apple ID. The devices must be within 30 feet of each other with Wi-Fi, Bluetooth, and Handoff switched on.
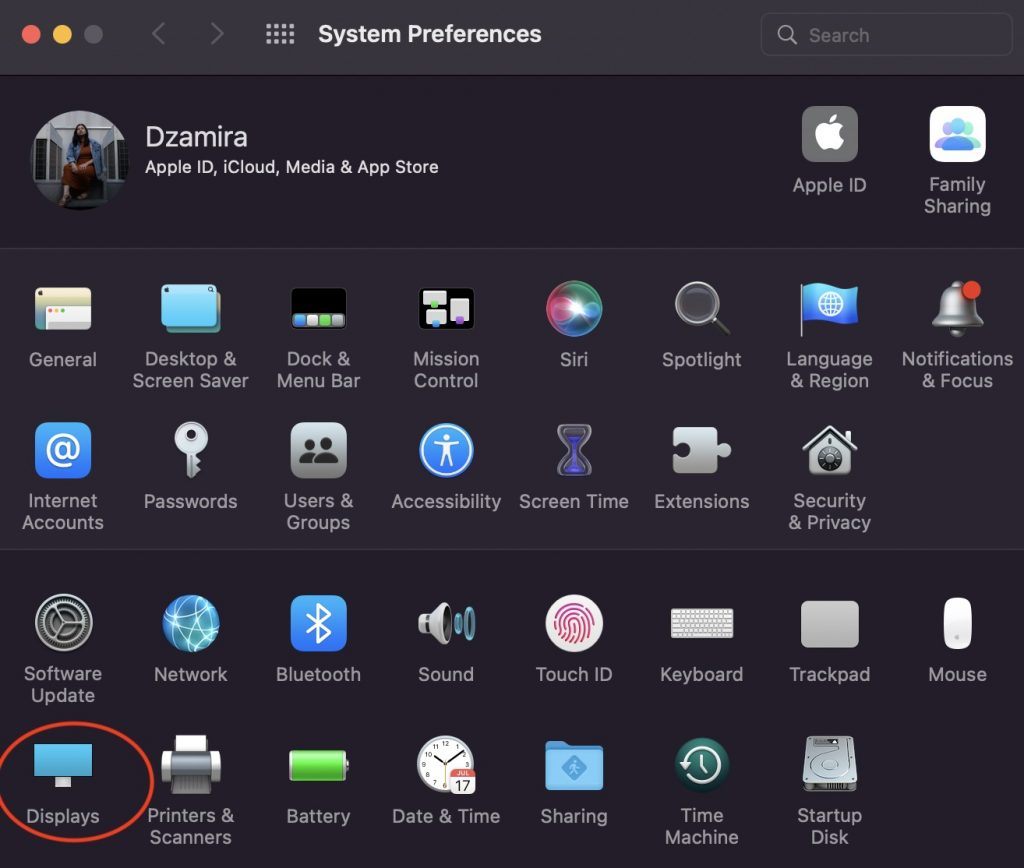
- Open up System Preferences on your Mac
- Choose Displays
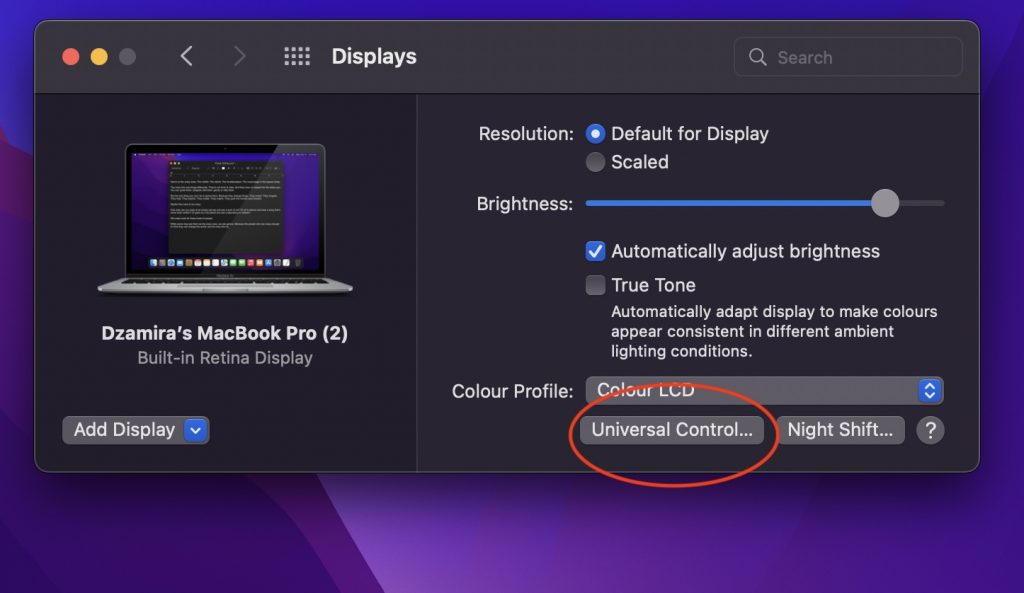
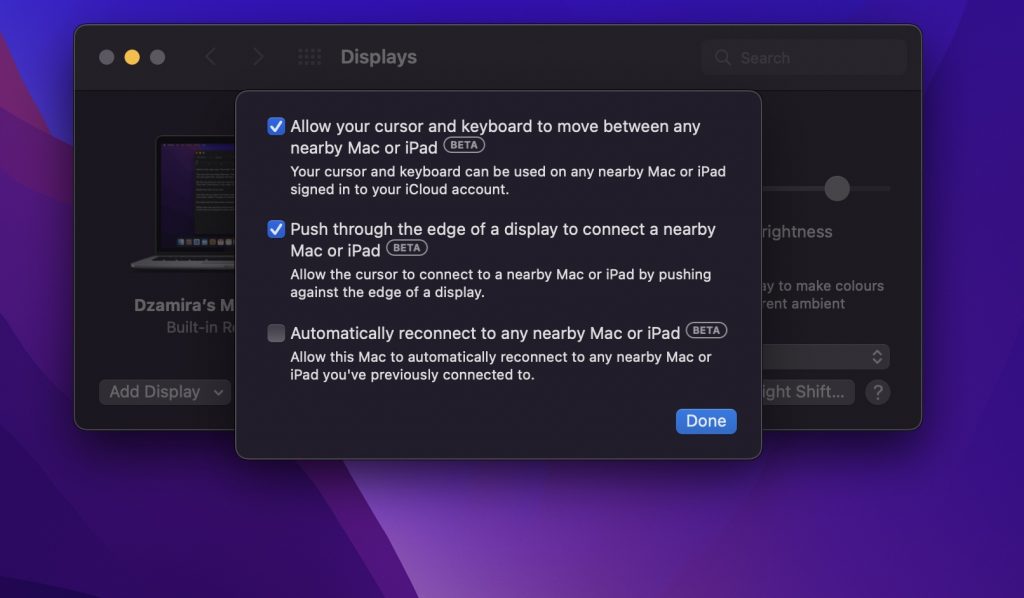
- Press on Universal Control at the bottom of the Displays menu
- Check the box for “Allow your cursor and keyboard to move between any nearby Mac or iPad”
- Check the box for “Push through the edge of a display to connect a nearby Mac or iPad”
- Press Done
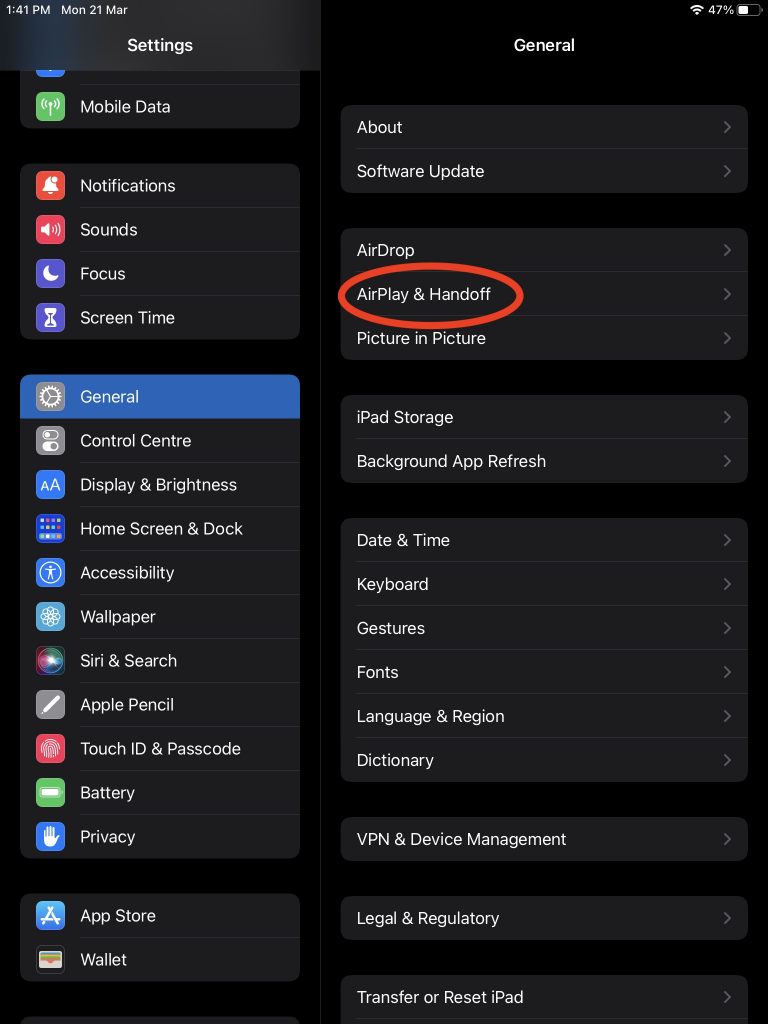
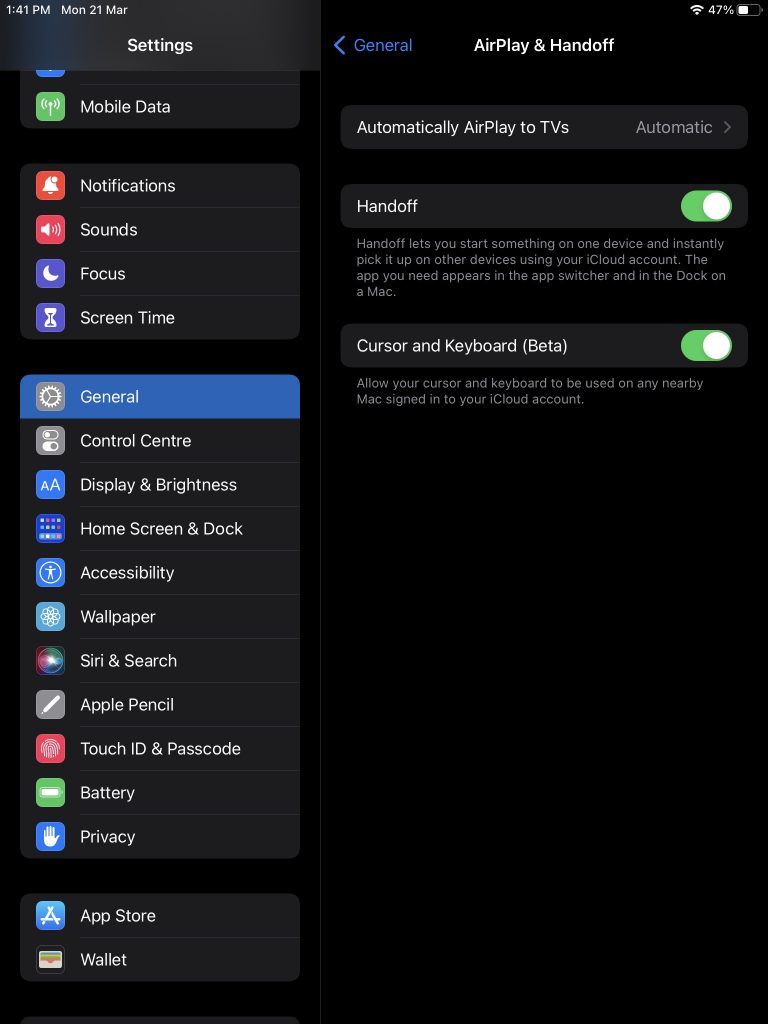
- On your iPad, open up Settings
- Choose General, and than Airplay & Handoff
- Enable Cursor & Keyboard
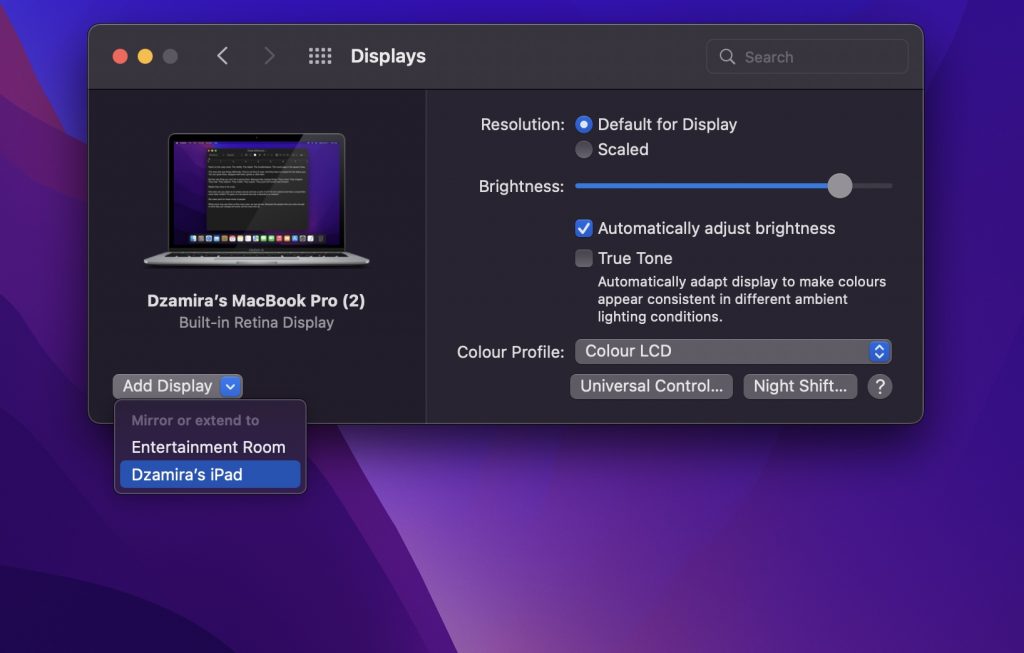
- Once the feature has been enabled on both your Mac and iPad, position the two devices next to each other. You can choose which side you prefer
- On your Mac, press on Add Display through Displays. You’d be able to select the iPad you want to connect to
- Move the cursor past the left or right edge of your display in the same direction as the device you want to link up with
- You should see an animation on that other device showing your Mac’s cursor “pushing through” onto its screen
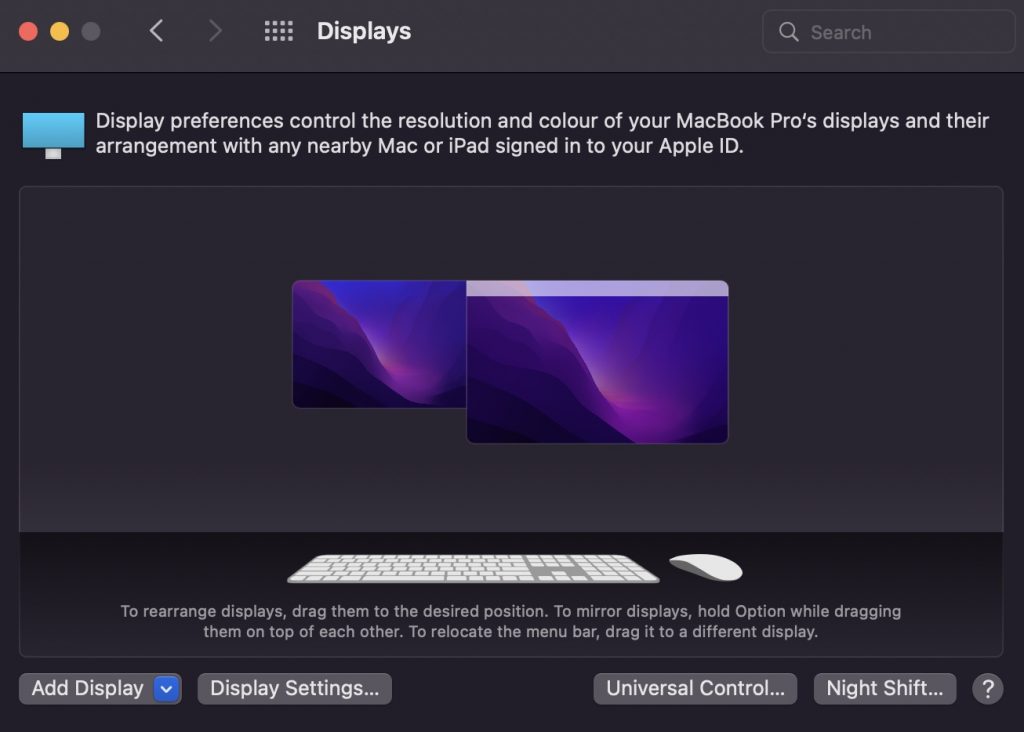
- You’re also able to change up the displays’ position anytime you want, by clicking and dragging the screens on your Mac’s Displays Settings
The dragging of the display positions is actually pretty neat. It doesn’t have to just be the basic right or left of the main screen, but you can drag it, for example, on the top left, or the bottom near the left—basically it could be positioned anywhere you want. You can even mirror the displays by pressing Option while dragging one display on top of the other. With Universal Control, you can also seamlessly drag and drop files between macOS and iPadOS.
Once you’re done with the secondary Universal Control device, you can press on the Screen Mirroring icon at the top of the Mac’s screen. To disconnect all devices, press Control-Option-Command-Delete on your keyboard. You can learn more through Apple’s official site.
[ SOURCE, IMAGE SOURCE ]

