Earlier, we covered why vanilla Android wasn’t the flavour for you, much to the chagrin of fanatical Android purists who didn’t hesitate to declare their undying devotion to the stock Android experience, mocking us in the process. While that was – for the most part – amusing, we were glad to see that there were even more who were able to form logical arguments and valid points towards the strengths and weaknesses of the stock OS.
Kudos to you!
What most people do not realise is that there are users (in fact a considerable majority) who use their devices in the configuration it came out of the box, fearing to dig deeper into their device’s settings in the event something disastrous happens. While one could make the argument that previous Nexus devices were geared more towards those with experience rather than the mass market, we feel that the Nexus 6P is the first truly “mainstream” Nexus device that we would have no problem recommending to anyone.
It’s got great software, a great camera, a great screen, and a premium build with a premium price to boot. Naturally, more and more people who are not so entrenched, some inexperienced, in the ways of the Android (sorry coming off a Star Wars high here) would be enticed to purchase this device.
If you are one of those people and the entire universe of Android customisation seems a little too overwhelming, fret not, we’ve got you covered. Here are a few bite-sized pieces of beginner-friendly customisability that should improve the usability of your Nexus device.
[nextpage title=”File manager”]

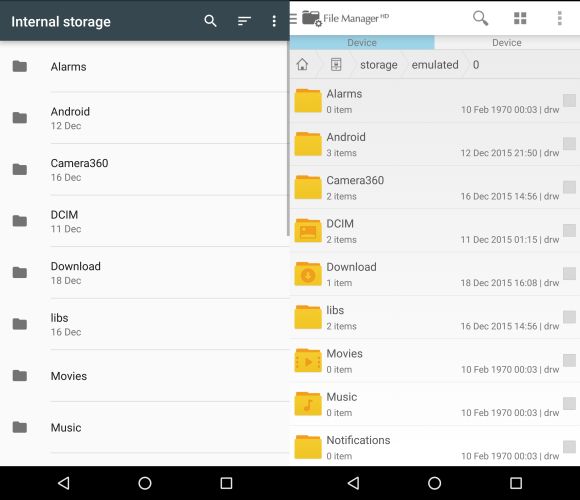
File managers are essential in the maintenance of your Android device’s files, from songs, videos, movies, chat backups, APKs and more. Most Android skins come with a dedicated file manager pre-installed and while the Nexus 6P does let you look at your internal files, this option isn’t an application by itself.
To access it:
1. Head on into your settings menu and look for the “Storage & USB” option.
2. Once there, scroll to the bottom and hit “Explore”, and your phone should bare its internals at you.
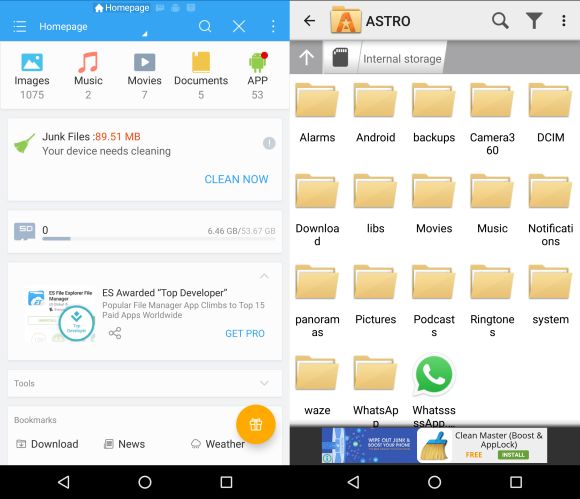
Keep in mind, you can only view, delete and copy your files to the cloud/downloads folder via this option so if you do want to do other fancy stuff like install APKs, rename files or even move them to a separate folder within your phone, we suggest you install a third party application. The one we’re using is the File Manager HD, but there are other compelling options including Astro File Manager and ES File Explorer File Manager which are also loaded with functionality.

[nextpage title=”Camera”]

If the Nexus 6P’s barebones camera app simply doesn’t cut it for you, there are plenty of other options in the Play Store for you to choose from. One of the most popular camera applications is Camera360 which comes with a host of beauty features, filters, among others. If you need decent manual controls for your photography, A Better Camera‘s free app does a pretty good job for a free application. It lets you adjust white balance, exposure metering, a manual focus mode and a whole bunch of other goodies. If you’re all about that manual controls, you can consider spending a little money to get
If you’re all about that manual controls, you can consider spending a little money to get Camera FV-5 , which has great manual settings and even allows you to shoot in RAW format. There is a free version called Camera FV-5 Lite, but that only allows you to shoot up to 0.3 megapixels and you lose the ability to shoot in RAW.
[nextpage title=”Animations”]

We’ve come a long way from the days when the Android operating system had limited animations when swapping between windows, but sometimes these animations can make the phone feel a little sluggish. Well, there is a handy little tip for those who want a slightly snappier performance on their Android device and it doesn’t have to be the Nexus 6P. All you need to do is head on into your Settings > About phone, and tap on the “Build number” 7 times and a popup should appear informing you that you are now a developer.
To do this:
1. Head on into your Settings > About phone
2. Tap on the “Build number” 7 times and a popup should appear informing you that you are now a developer.
3. Return to the Settings menu and scroll down your new “Developer options”.
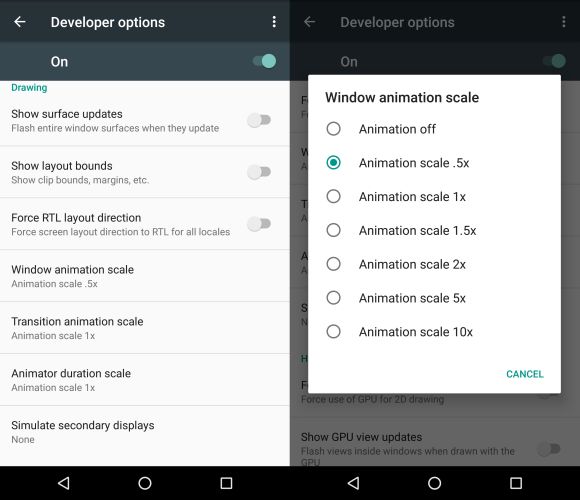
4. From there, scroll down to find the “Window animation scale”, “Transition animation scale”, and the “Animator duration scale” options.
Tapping on each one will allow you to change the speed of each of the animations, so a shorter time will mean a faster, snappier performance while a longer time will make it seem like you’re trapped in a slow-mo tunnel (which is actually kinda cool too).
[nextpage title=”Battery indicator”]

If you’ve used the Nexus 6P for awhile now you should notice that one of the most annoying things about glancing at the device is the inability to find out immediately what the battery percentage is. You have to roll down the entire quick panel before the battery percentage will show itself. Users also don’t have the ability to change what settings appear in the quick settings menu. Thankfully there is a built-in way around this little bit of inconvenience. When you pull down the quick settings menu, you will invariably notice the little gear icon at the top right corner.

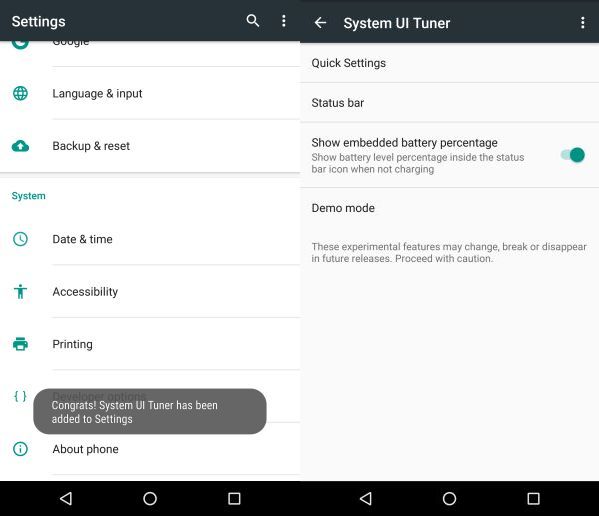
Tapping it once will bring up your settings menu. If you tap and hold it however, it will begin spinning, once it does that simply let go and a prompt will alert you that the System UI Tuner has been added to Settings. From there, you can change what appears on your quick settings, status bar, as well as have the option to embed your battery percentage. Rather nifty, except the embedded battery icon is almost indiscernible unless you hold the screen right up to your face and squint.
Alternatively, you can opt to install a third-party application from the Play Store. There are plenty of pretty decent applications – like GSam Battery Monitor, Battery Notifier BT and Battery – that lets you monitor a whole bunch of stuff like which apps are drawing the most power, as well as your battery temperature.
[nextpage title=”Root”]

Anyone who has used an Android phone would have heard of rooting, and for those who don’t know what that is, it has nothing to do with trees. The analogy is there though as rooting means allowing you access to the very root of the device, allowing you more freedom to access the device’s settings, change a bunch of stuff and even allow your device to do things it previously couldn’t, like double-tap to wake. To root, simply follow the instructions on this XDA-Developers forum.
Be warned though that rooting your device usually voids your warranty unless explicitly stated otherwise. Please proceed with caution and understand that you will be doing this at your own risk and we will not be responsible if any damage or harm comes to your device.
[nextpage title=”Flashing”]

No, not that kind of flashing. Flashing a new ROM into your device basically means installing a different version of the Android OS onto said device. This is usually done because the user is unhappy with their current Android OS or simply wants a different look and feel as well as potentially different features. Android Police did a comprehensive article about custom ROMs and flashing, so do check that out if you want to learn more.

There are many different developers that provide different custom versions of Android, from individual developers to people like CyanogenMod (CM). CyanogenMod ROMs provide users with a stock look and feel to their Android OS, while adding some extra functionality and customisation.

You’ve probably encountered Cyanogen before if you’ve heard of or bought OnePlus‘ first “flagship killer” the One. It is one of the few phones that can be considered a Cyanogen phone so it basically lives and dies with how well they can keep the software updated. The only difference is, the OnePlus runs on Cyanogen OS, not the community-based CyanogenMod.
These guys also assign code names to specific phones, ranging from bacon (OnePlus One) to angler and bullhead, which are the code names for the Nexus 6P and Nexus 5X respectively. Custom ROMs usually come in 3 different builds: Stable, Nightly and Snapshot.
For more information on these build states, a CyanogenMod forum admin (bassmadrigal) posted a detailed explanation on the CM forums about the differences between these builds. Their custom ROMs for the Nexus 6P can be found here. To install, simply follow the instructions in the same XDA-Developers Forum link to Heisenberg’s How To guide earlier. Once again, do so at your own risk.
Android customisation is incredibly vast and that is one of the reasons why this OS so popular. If you’re just starting out, Google is your best friend, so make sure to do lots of research before trying your hand at rooting and flashing custom ROMs. Good luck!
To everyone else, if you have a Nexus 6P and have any other cool customisation suggestions, do let us know in the comment section below.


